
How to Safely Change a Wound Dressing at Home: A Step-by-Step Guide
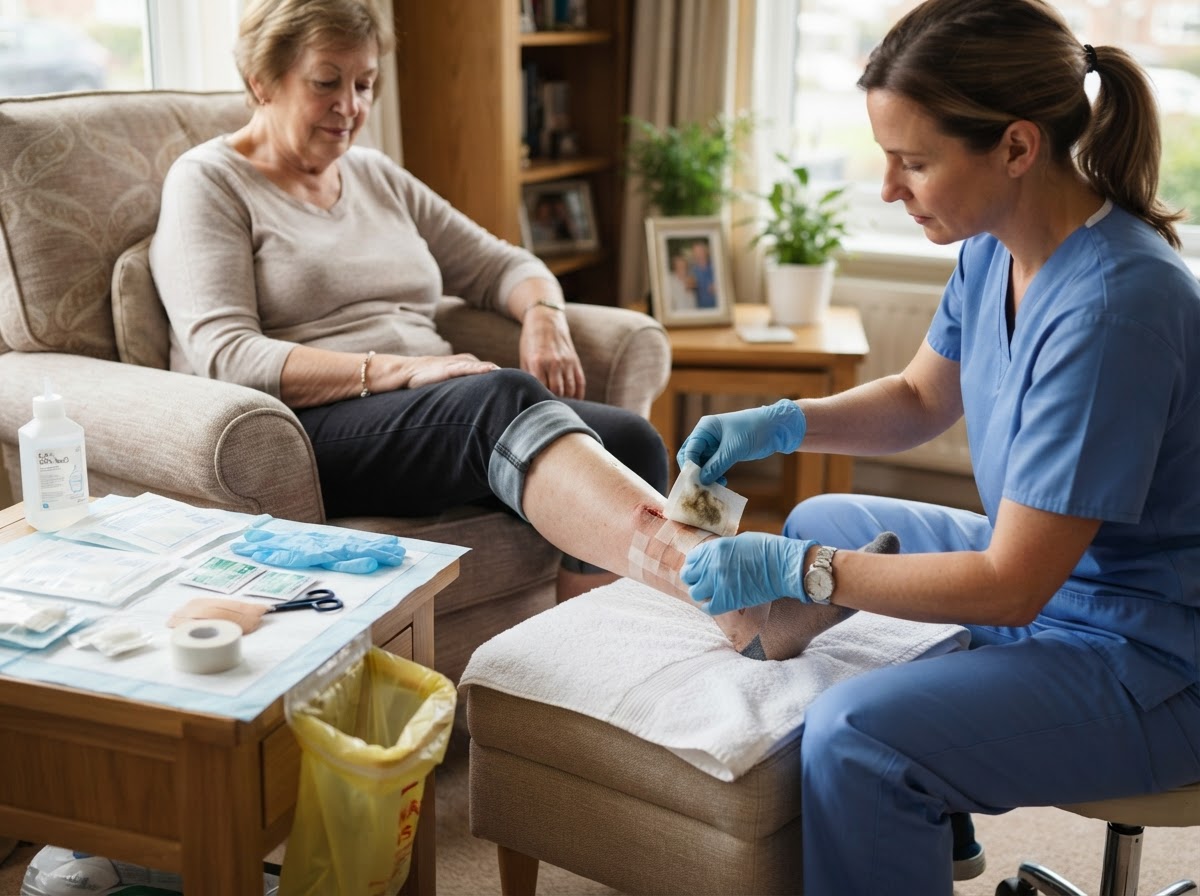
Changing a wound dressing at home can feel intimidating. This step-by-step guide walks Broward patients and caregivers through the process safely and confidently.
Content reviewed for accuracy by our clinical network • Last updated: August 2026
Why Proper Dressing Changes Matter
A wound dressing does more than cover a wound. It creates a controlled environment that keeps the wound moist, absorbs drainage, protects against bacteria, and supports the body's natural healing process. When a dressing is changed correctly, the wound stays clean and protected. When it is changed incorrectly — with unwashed hands, the wrong supplies, or too much handling — the risk of infection rises and healing can slow. For patients managing wounds at home in Broward County, understanding the right technique is one of the most practical skills you can learn.
It is completely normal to feel nervous the first few times you or a loved one changes a dressing. Many caregivers worry about causing pain or doing something wrong. The good news is that with a clear routine, the right supplies, and a little practice, most people become comfortable within a week or two. Your in-home wound care clinician is there to teach you, watch you practice, and answer every question — you are never expected to figure it out alone.
This guide breaks the process into clear, manageable steps. It also covers what to avoid, how to handle common concerns, and when to call your nurse instead of changing the dressing yourself. Always follow the specific instructions your clinician gives you, as every wound is a little different.
Gather Your Supplies Before You Start
The most common mistake people make is starting the dressing change and then realizing they forgot something, which means walking away with the wound exposed or contaminating clean supplies by reaching for them mid-process. Before you touch the old dressing, lay everything out on a clean surface. You will typically need: clean gloves (non-sterile is usually fine unless your clinician specifies sterile), the new dressing your nurse recommended, medical tape, a clean trash bag within reach, gauze pads or clean wipes for cleaning, and any prescribed ointment or solution. Wash your hands thoroughly with soap and water for at least 20 seconds before you begin.
If your clinician has given you a specific cleaning solution — such as saline, a wound cleanser, or a prescribed antimicrobial — use exactly that. Avoid hydrogen peroxide or rubbing alcohol unless your nurse specifically instructs it, as these can damage new tissue and actually slow healing. Keep pets out of the room and choose a flat, well-lit surface. Having everything ready takes the pressure off and lets you focus on being gentle.
For patients with diabetic foot ulcers or venous leg ulcers, the dressing may include multiple layers or compression wraps. Your clinician will show you the exact order those layers go on, and it helps to write it down or take a photo the first time so you have a reference.
Step 1: Remove the Old Dressing Gently
Put on a pair of clean gloves. Slowly and carefully peel back the tape or remove the bandage, pulling in the direction of hair growth to minimize discomfort. If the dressing is stuck to the wound, do not yank it. Instead, moisten it with a little saline or clean water and wait a minute or two for it to soften, then gently lift it away. Forcing a stuck dressing can tear fragile new tissue and restart bleeding.
Once the dressing is off, take a moment to look at it before you throw it away. Note the color and amount of drainage, whether there is an odor, and whether the old dressing looks dry or soaked. This information helps your clinician track how the wound is progressing. Place the old dressing directly into your trash bag and remove your gloves. Wash your hands again before moving to the next step.
Step 2: Clean the Wound and Surrounding Skin
Put on a fresh pair of gloves. Using the cleaning solution your clinician recommended, gently wipe the wound from the center outward, using a new gauze pad or wipe for each pass. The idea is to move from the cleanest part of the wound toward the edges so you do not drag bacteria into the center. Do not scrub. A gentle, single wipe in one direction is enough for each area.
Clean the skin around the wound too, removing any dried drainage or adhesive residue. Pat the area dry with a clean gauze pad. If your clinician has prescribed an ointment or medication, apply it now using a clean cotton swab or gauze, using exactly the amount you were told to use. More is not better — a thin, even layer is usually what is recommended.
Step 3: Apply the New Dressing
Open the new dressing package without touching the part that will go directly against the wound. Place it over the wound, making sure it fully covers the area with a margin of healthy skin around the edges. If you are using a layered dressing, follow the order your clinician showed you — for example, a contact layer first, then an absorbent pad, then a compression wrap. Smooth out any wrinkles, as folds can create pressure points that lead to new skin breakdown.
Secure the dressing with medical tape, being careful not to stretch the tape too tight. For wounds on arms or legs, avoid wrapping tape all the way around the limb, as this can cut off circulation. If your dressing includes a compression wrap for a venous ulcer, apply it at the tension your clinician demonstrated — snug but not painful. Remove your gloves, wash your hands, and dispose of all used supplies.
Common Mistakes to Avoid
A few habits cause most of the problems people run into. First, skipping hand-washing is the fastest way to introduce bacteria. Wash your hands before and after every dressing change, every time. Second, using the wrong supplies — substituting a different dressing because you ran out of the right one — can change the moisture balance and slow healing. If you are running low, call your supplier or clinician before you run out completely.
Third, changing the dressing too often or not often enough can both cause problems. Your clinician will tell you how often to change it, and that schedule is based on how much drainage your wound produces. A heavily draining wound may need daily changes, while a drier wound may do better with less frequent changes to avoid disturbing new tissue. Finally, ignoring signs of infection — increased redness, warmth, odor, or pain — is dangerous. If you notice these, do not wait for the next scheduled change. Call your clinician right away, as these may be signs of an infected wound.
When to Call Your Nurse Instead
There are times when you should not change the dressing yourself and should call your clinician instead. If the wound is bleeding and does not stop after gentle pressure, if you see yellow or green drainage with a foul odor, if the surrounding skin becomes increasingly red, swollen, or warm, or if the patient develops a fever, these are all reasons to call. Similarly, if the dressing comes off and you are not confident about how to replace it correctly, it is always better to call than to guess.
Your in-home clinician would much rather get a phone call about a small concern than learn about a serious complication later. For surgical wounds in particular, early signs of complications like dehiscence (the wound opening up) are easy to miss without clinical training. If you are ever unsure, call. Understanding your insurance coverage for in-home visits can also ease the worry — many follow-up visits are covered by Medicare.
Conclusion
Changing a wound dressing at home is a skill, and like any skill it gets easier with practice and guidance. By gathering your supplies, washing your hands, working gently, and following your clinician's specific instructions, you can keep the wound clean and protected between visits. Remember that your in-home nurse is your partner in this process — they are there to teach you, answer questions, and step in when something does not look right. If you or a loved one in Broward County needs help managing a wound at home, call Wound Care Broward at (954) 477-6688 or use the contact form to request a provider call.
Frequently Asked Questions
Q: How often should I change the dressing?
A: It depends on the wound and the amount of drainage. Your clinician will give you a specific schedule. Some wounds need daily changes, while others do better with less frequent changes to protect new tissue.
Q: What if the dressing is stuck to the wound?
A: Do not pull it off. Moisten it with saline or clean water, wait a minute or two for it to soften, and then gently lift it away. If it still will not release, call your clinician for help.
Q: Can I use hydrogen peroxide to clean the wound?
A: Only if your clinician specifically tells you to. Hydrogen peroxide and rubbing alcohol can damage new tissue and slow healing. Saline or a prescribed wound cleanser is usually recommended.
Q: Should I wear sterile gloves?
A: For most home dressing changes, clean non-sterile gloves are sufficient if you use good technique. Your clinician will tell you if your wound requires sterile gloves and a sterile technique.
Q: What do I do if I run out of supplies?
A: Call your supplier or clinician before you run out completely. Using the wrong dressing as a substitute can change the wound environment and slow healing.